The Auto Reply feature allows you to automatically send a message when someone contacts your WhatsApp account. This is useful when you are unavailable, or when users first message you and your chatbot hasn’t responded yet. Unlike the Chatbot, Auto Reply does not require a keyword.
🔍 Why Use Auto Reply?
- Some first-time users may not receive chatbot responses or may see “Waiting for this message. This may take a while”
- Auto Reply ensures a message is sent even when the chatbot doesn’t respond
- Helps cover cases where WhatsApp messages haven’t synced yet for new contacts
- Ensures every user gets a response instantly, including outside working hours
- Avoids missed opportunities from unread or unhandled incoming messages
- Builds trust and professionalism by acknowledging all incoming chats
- Improves user experience, especially for new or first-time contacts
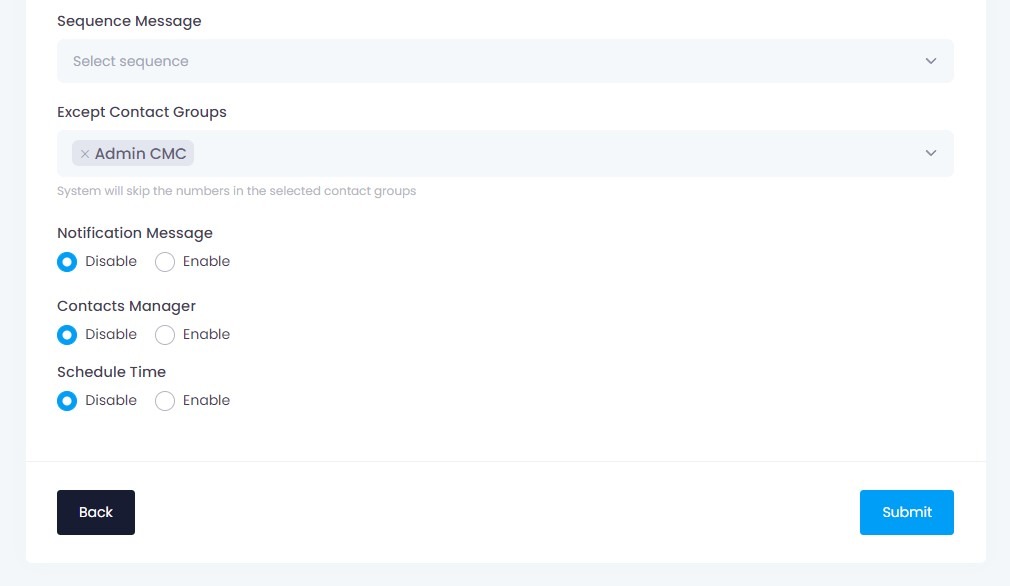
- You can exclude contact groups such as admins or unsubscribes from receiving Auto Reply
Step 1: WhatsApp > Features > Auto Reply
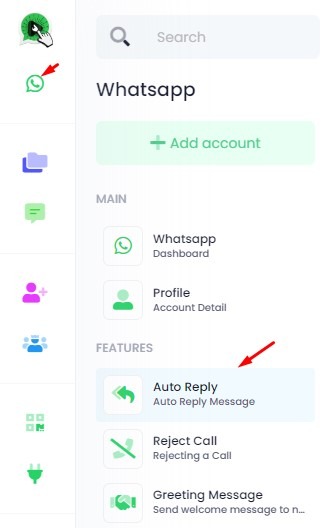
- Click the WhatsApp icon from the left menu
- Under Features, select Auto Reply
Step 2: Choose WA Account
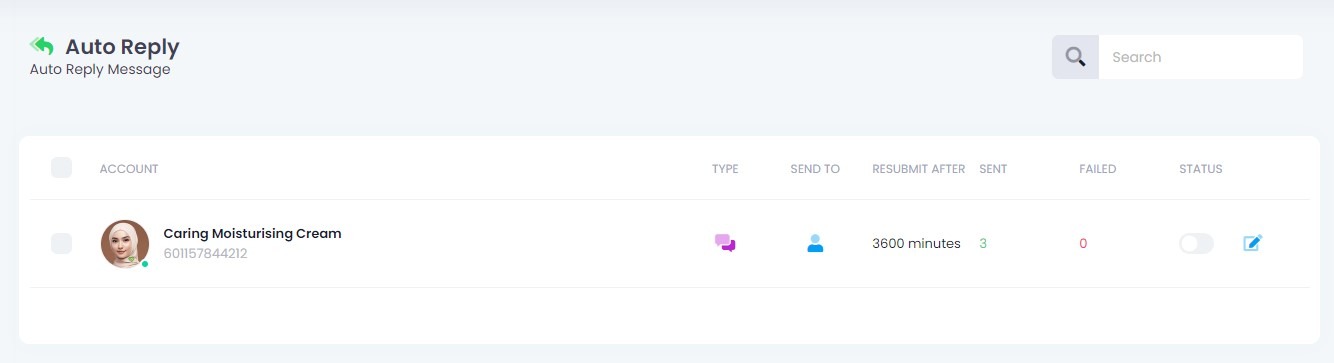
- Select the WhatsApp account you want to activate Auto Reply on.
Step 3: Configure Reject Call Settings

Enable the Feature
Set Status to Enable to activate the Auto Reply feature for your selected WhatsApp account.Select Recipient Type
Choose who should receive your auto reply:
All – reply to everyone
Individual – reply only to personal chats
Group – reply only to WhatsApp groups
Custom – manually choose specific Contact Groups, WA Contacts, or WA Groups
Exclude Specific Contacts (Optional)
Set Exclude to Enable if you want to skip auto replies for certain users.
You can exclude based on:
Contact Groups
WA Contacts
WA Groups
Enable Send Message
Set Send Message to Enable to send an auto reply when someone messages you.
- Text & Media – for messages that include image, video, audio, or document
- List – to send a structured menu with selectable options
- Location – to share a map location
- vCard – to send a contact card with name and number
Upload Media File (Optional – for Text & Media only)
If you selected Text & Media, upload your file using the File Manager.Write Your Caption Message (Text & Media only)
Enter your message in the Caption box. You can personalize with dynamic tags and emojis.
Example:
					[greet|Selamat pagi|Selamat tengah hari|Selamat petang|Selamat malam] & Hai [wa_name] 👋👋

FREE 7 HARI
kami beri try FREE dulu (Free trial 7 Hari untuk user baru daftar) 👇
https://pro.click4wasap.com/signup?ref=click4wasap

Info lanjut boleh baca di website kami
8. Set Re-trigger Interval
Use Re-trigger After (minute) to define how long to wait before sending another auto reply to the same person.
You can set it up to 3600 minutes.
Step 4: Click Submit Button
- Double-check your settings.
- Click the Submit button to activate the Auto Reply.
❗ Please Read Before Submitting
⚠️ If Send Message is disabled, you must enable at least one of the following features below to proceed:
- ✅ Sequence Message – for follow-up automation
- ✅ Next Bot Action – to trigger the next chatbot step
- ✅ Notification Message – to alert your admin or group
- ✅ Labels Manager – to tag the user with a label
- ✅ Contact Manager – to add the user into a contact group
🚫 If none of these are enabled, the system will block submission and show this error
Advance Features
- These features are optional.
- Sequence Message
- Next Bot Action
- Notification Message
- Labels Manager
- Contacts Manager
- Schedule Time