Next Bot Action allows you to link multiple chatbots together using Keyword or ID. This is useful when you use Capture Data and want to ask multiple questions step-by-step.
✅ Please ensure your keyword uses Exact Match Type and is unique.
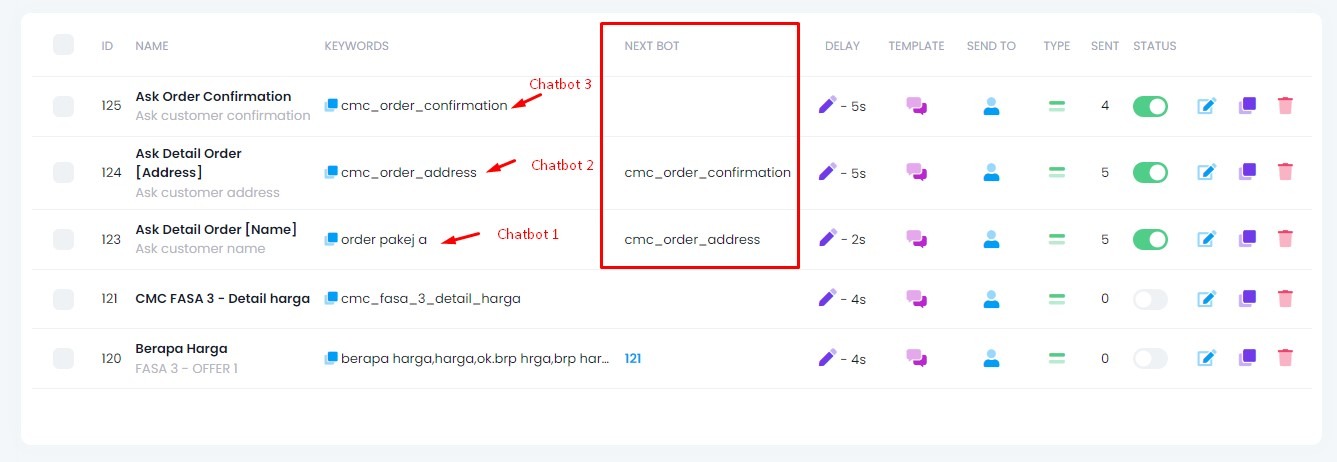
Step 1: Create Multiple Chatbots
Create separate chatbots for each question you want to ask.
Example Setup:
Chatbot 1 Message:
					Thank you for your interest in Package A.
To proceed with your order, may I know your Name?
Capture Data: Name
Shortcode: [Name]
Once the user replies, connect this to the next chatbot to ask for the address.
Chatbot 2 Message:
May I know your address?
Capture Data: Address
Shortcode: [Address]
After capturing the address, connect to another chatbot to confirm the collected data.
Chatbot 3 Message:
					Thank you. Here is your detail:
Name: [Name]
Address: [Address]
Is this correct?
Step 2: Use Exact Match & Unique Keywords
Set your chatbot keyword using Exact Match Type. Avoid common words to prevent accidental triggers. Use characters like _ or – to make it unique.
Example Keyword:
order_address
This ensures only the correct message will trigger the chatbot.
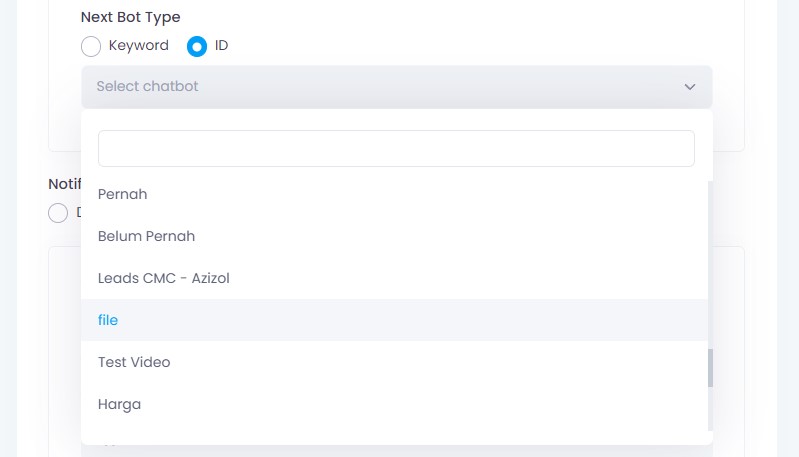
Step 3: Choose Next Bot Action (Keyword / ID)
You can select how the next chatbot is triggered:
Keyword: Type the unique keyword you created (e.g., order_address)
ID: Select the chatbot by its system ID from the list
💡 Even when using ID, your chatbot keyword must still be Exact Match and unique.