
Sequence Message is a super advanced feature that acts as a game changer for automations like Chatbot and Bulk Messaging.
It allows you to send multiple messages in a defined order with custom delays, without needing to create separate chatbots or bulk campaigns for each message.
🚀 Why Use Sequence Message?
- Eliminate the need to create multiple bots with the same keyword
- Easily manage follow-ups and nurturing flows
- Combine with bulk messaging for marketing campaigns
- Smooth customer experience with timed messages
Supported Features
Sequence Message is available in the following features:
- Auto Reply
- Reject Call
- Greeting Message
- Away Message
- Chatbot
- Quick Reply (NEW)
- Bulk Messaging
📌 Use Case Example: Marketing Campaign to Leads
Message 1: “🎉 Big Sale This Week!”
Message 2 (after 2 hours): “Still thinking? Here’s a special coupon: SALE10”
Message 3 (after 1 day): “Hurry, promo ends tomorrow!”
🔐 Note: “Follow Up (Time Send)” feature is only available in Silver & Gold Packages
Step 1. Remove Duplicate Chatbots (if any)
- If you’re upgrading from V1, you may have multiple chatbots using the same keyword to simulate multi-step messaging.
- Delete all duplicate chatbots with the same keyword.
Keep only one chatbot and use Sequence Message instead.
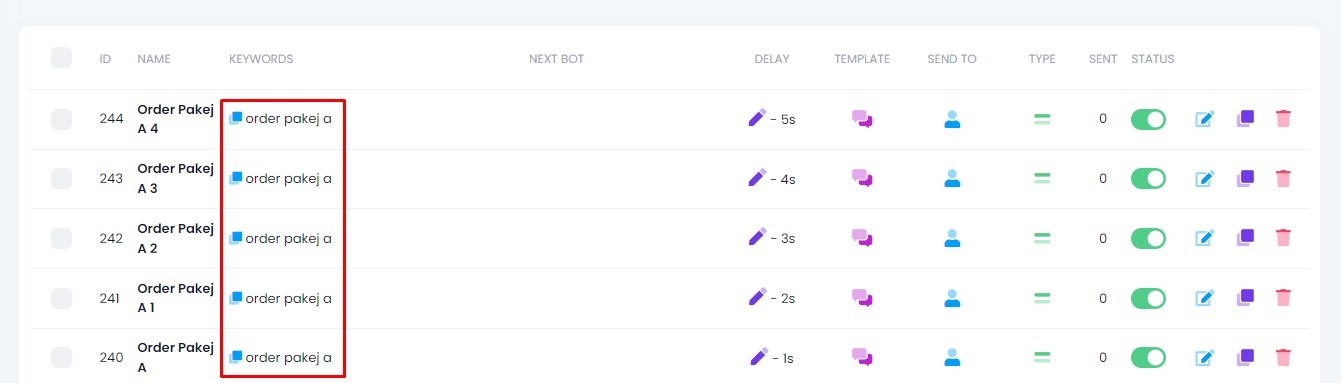
📌 Example Issue
- In the example above, the keyword order pakej a appears in 5 different chatbot entries, each with a different delay (e.g., 5s, 4s, 3s, etc.).
- This approach was commonly used before Sequence Message was introduced.
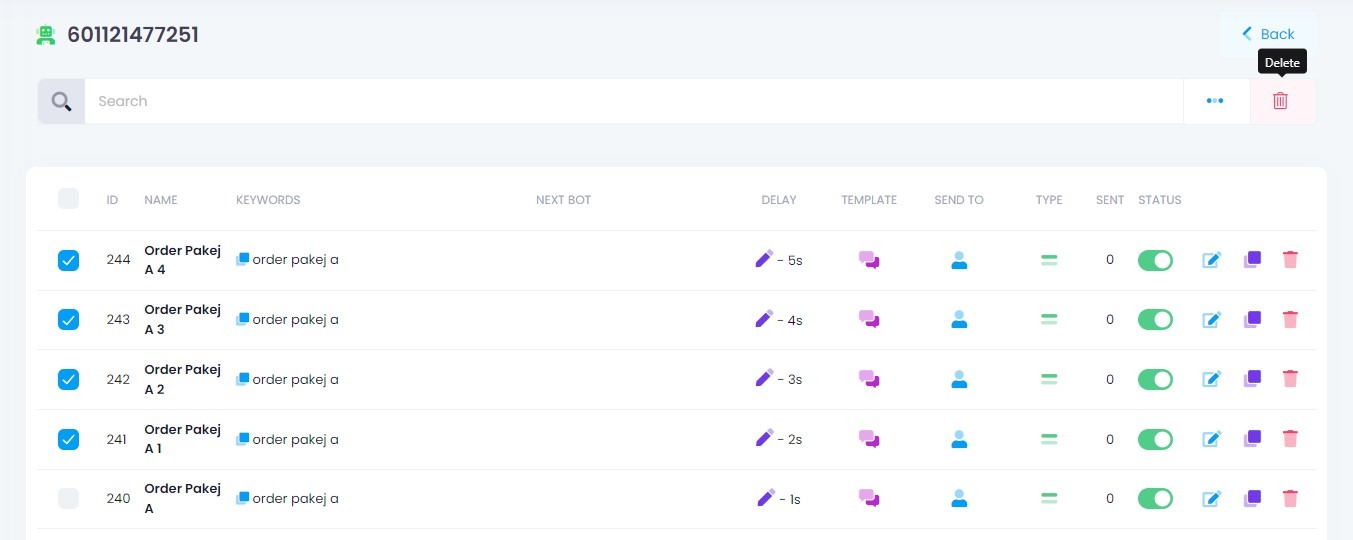
✅ What to Do
- You no longer need multiple chatbots with the same keyword.
- 👉 Simply keep one chatbot with that keyword.
- 👉 Then use the Sequence Message feature to handle multiple messages and delays properly.
- This ensures better organization, easier management, and compatibility with the latest version.
Step 2. Features > Sequence Message
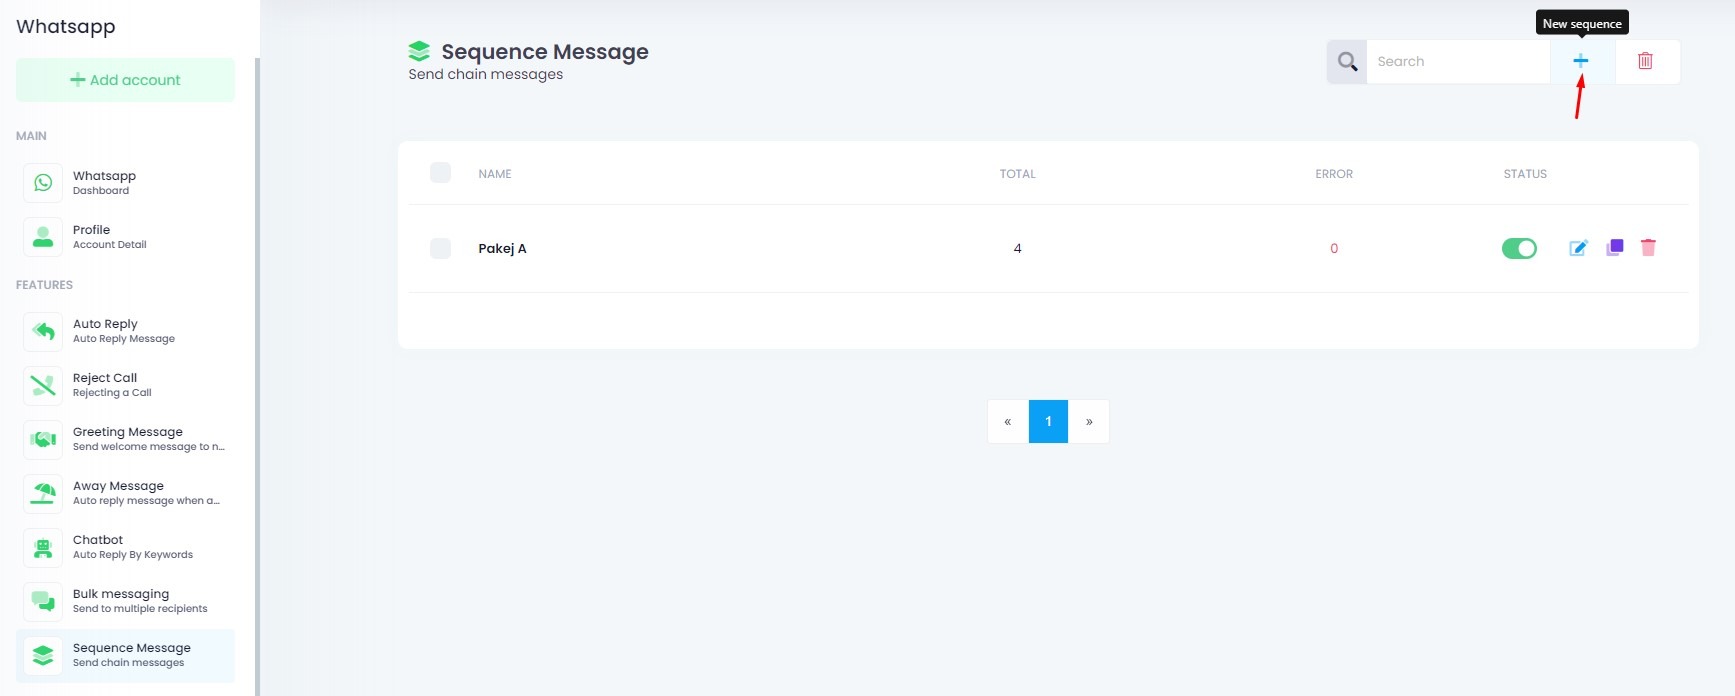
Click “Add New Sequence”
- In the Sequence Message page, click the + icon (top-right corner) labeled as New sequence.

Name Your Sequence
A popup window titled Create Sequence will appear.
- Set the status to Enable
- Enter your desired sequence name (e.g. Pakej A)
- Click the Create button
Your new sequence will now appear in the list and is ready for you to add message steps.
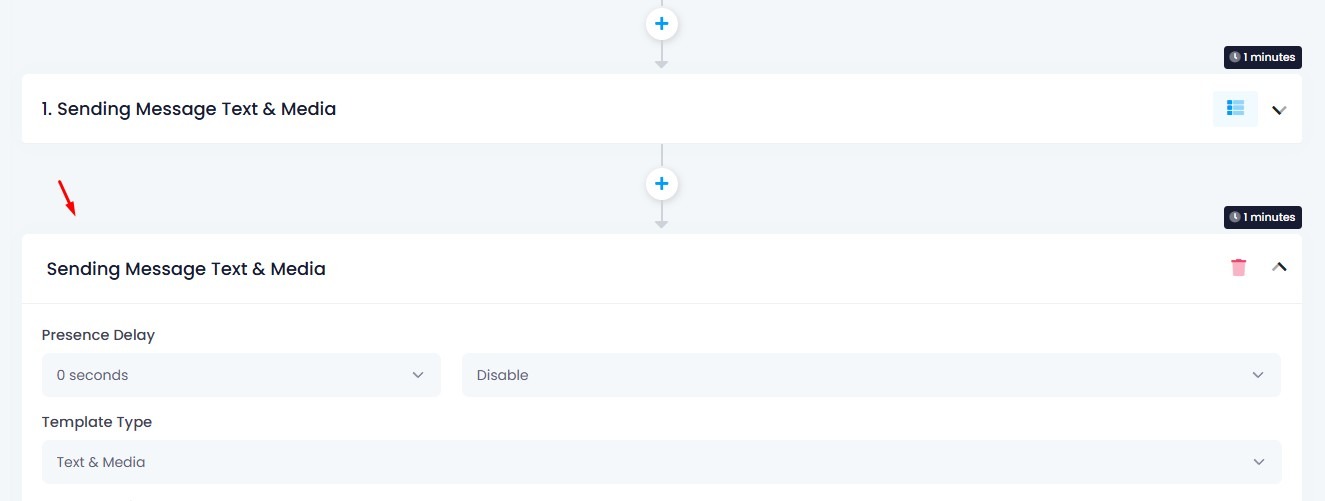
Step 3. Add Sequence Message

Start Adding Steps
Click the + button inside your sequence box to add a new step.
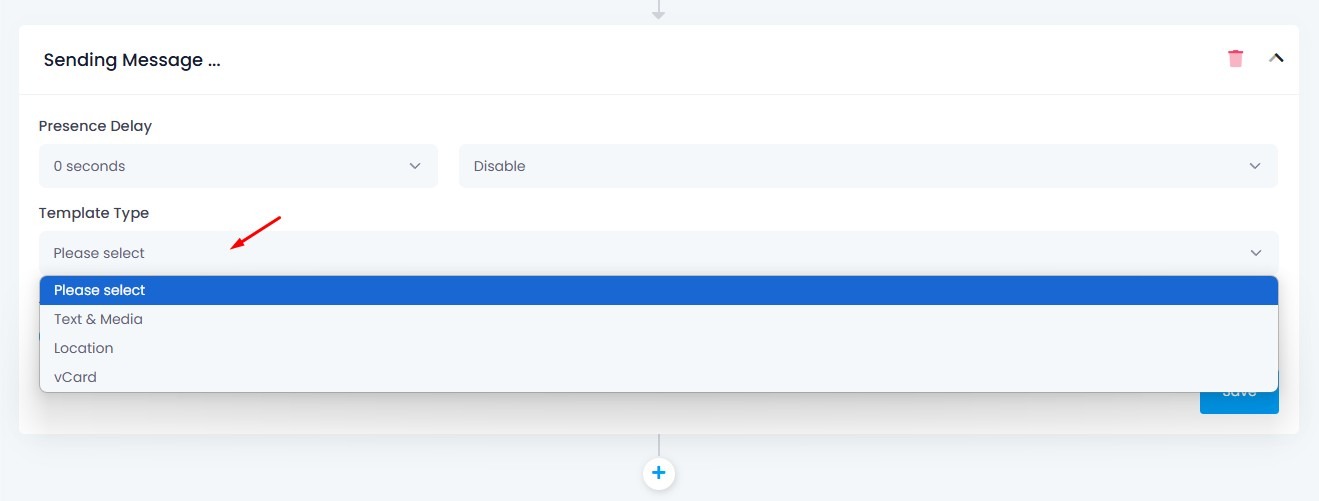
Choose Template Type
You’ll see a new message block appear.
Under Template Type, choose the format of your message:
- Text & Media
- Location
- vCard
Each type allows different content to be sent.
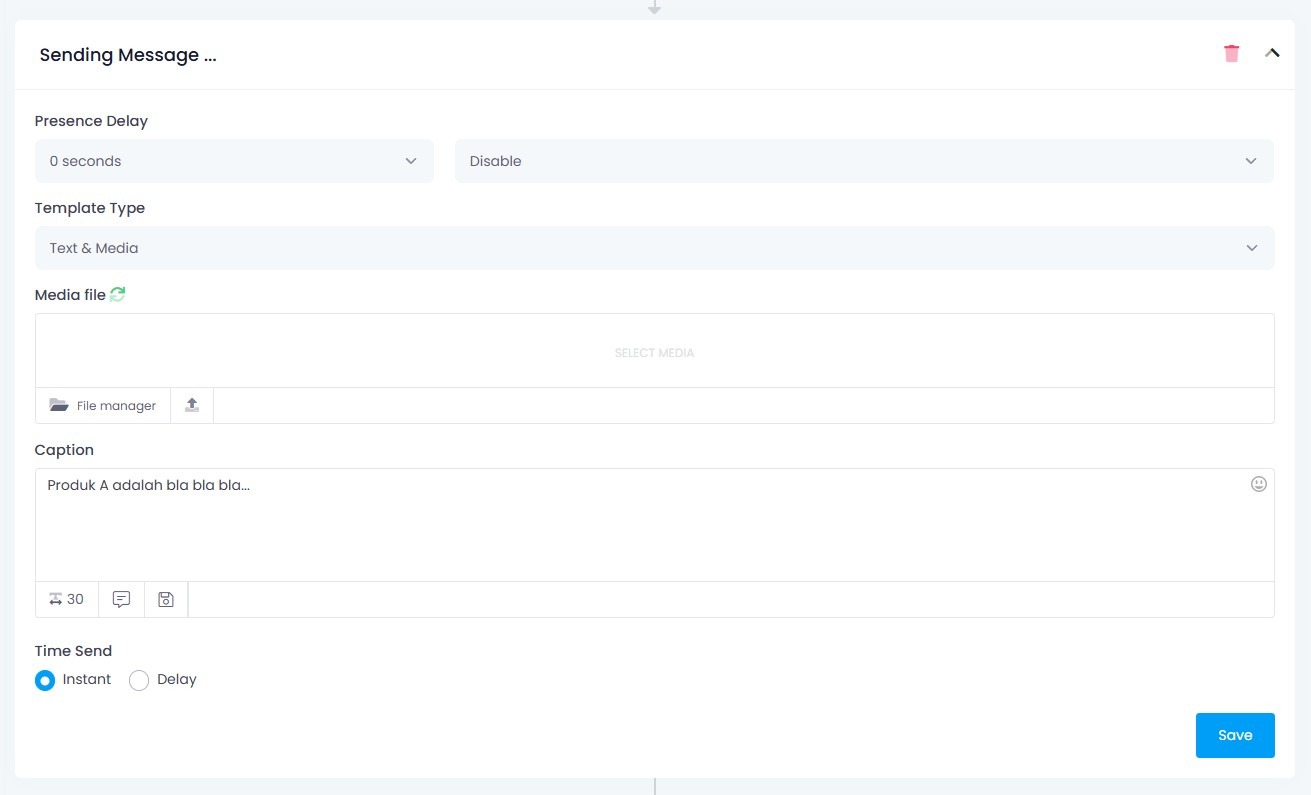
Edit Your Message
Once you select the template type:
Set the Presence Delay if needed (this simulates a typing delay).
Upload your media (optional).
Write your caption/message content.
Choose Time Send:
Instant – Message is sent immediately.
Delay – Message is sent after custom time (available only for Silver & Gold packages).
After setting everything up, click the Save button.
Follow Up (NEW)
Customize the error message to guide users if they reply with the wrong input.
Example:
The Follow Up feature allows you to schedule each message in your sequence with a custom delay, making your automation flow feel more natural and human-like.
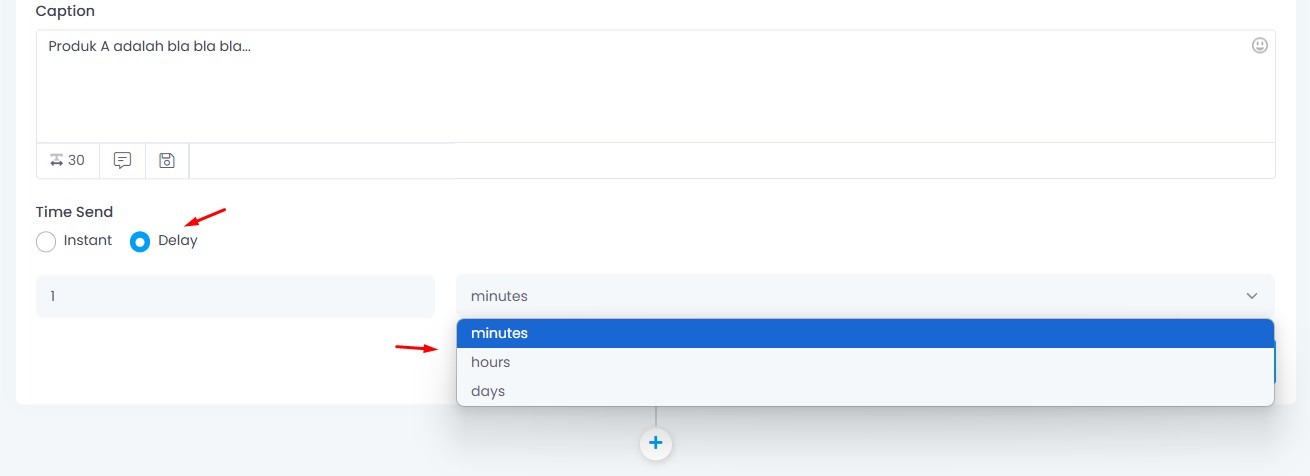
🕒 Time Send Options
When adding a message step, scroll to the Time Send section.
You will see two options:
- Instant – Sequence message will be sent immediately after the trigger.
- Delay – Sequence message will be sent after a specific amount of time.
⏳ Custom Delay Settings
When you select Delay, you can choose to send the message after a set number of:
- Minutes
- Hours
- Days
This allows you to build powerful follow-up campaigns such as:
- Message 2 → 2 hours after Message 1
- Message 3 → 1 day after Message 2
Step 4. Clone, Copy & Paste Sequence Message
This step helps you save time by duplicating existing message steps instead of rebuilding them from scratch.

🔁 Clone Step
To clone an existing sequence step, click the Clone Step icon from the dropdown menu of the message step.
A new, identical step will appear just below the original.
📌 Important:
You must save each cloned step individually after cloning.
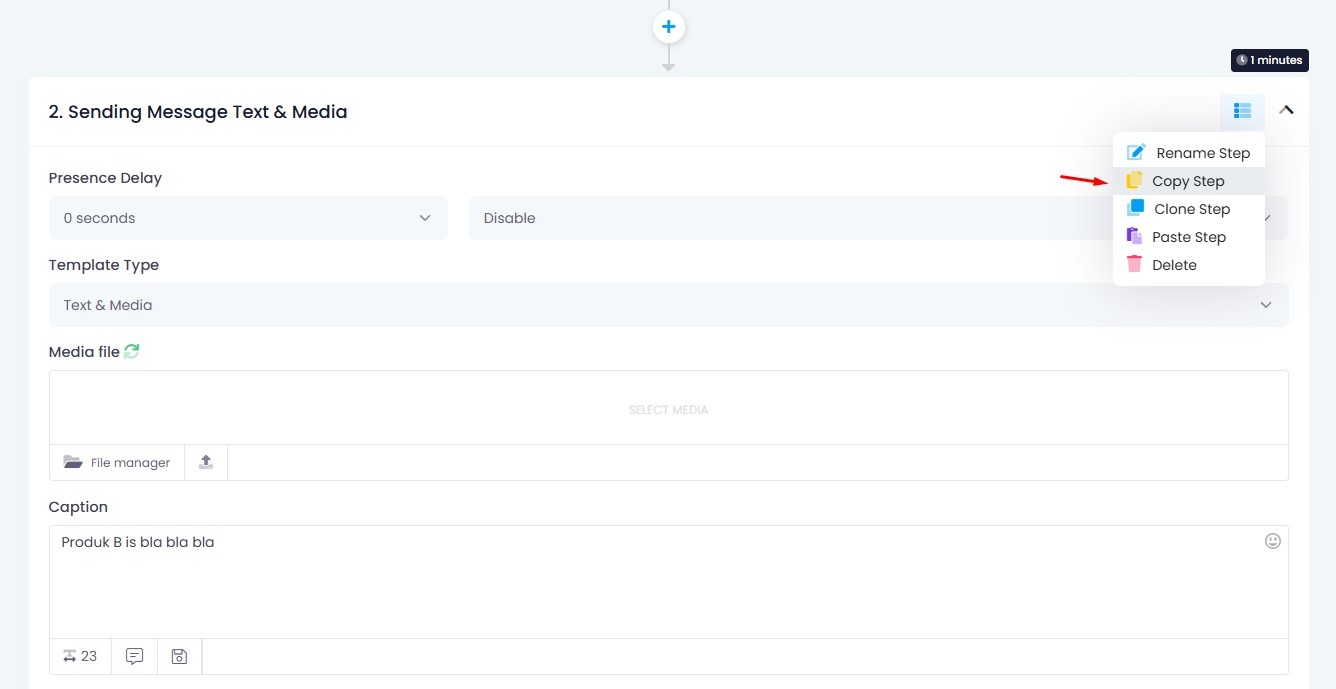
📋 Copy Step
- Click the Copy Step option to copy a step’s configuration and content.
- This lets you reuse the message in another sequence or replace an existing one.
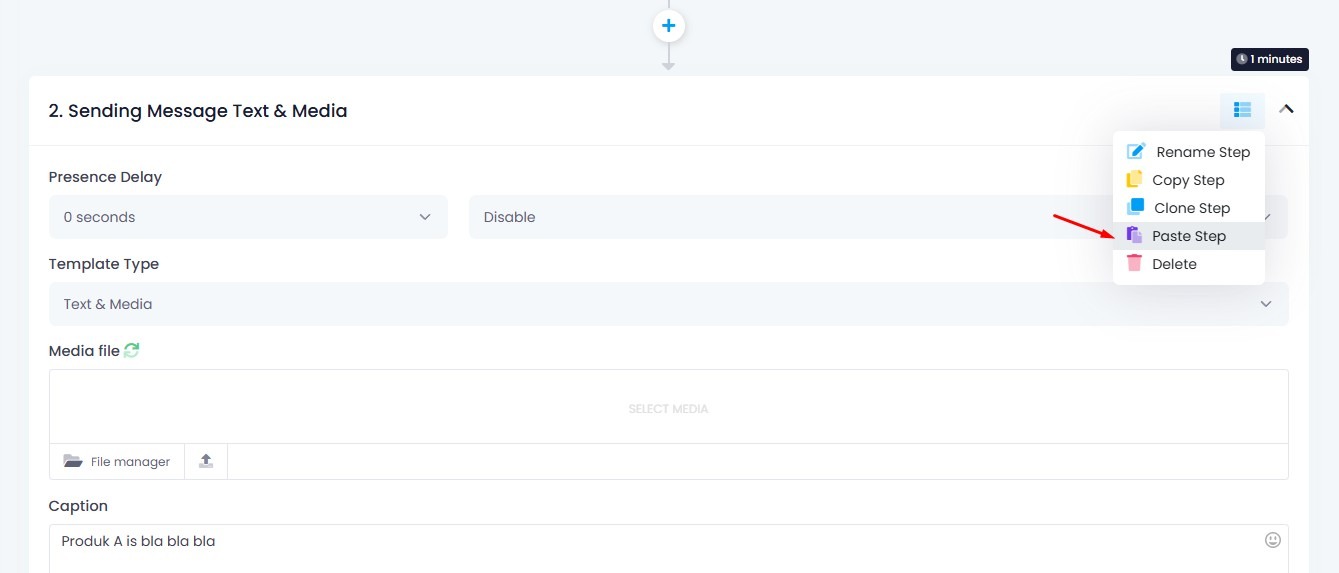
📌 Paste Step
- Navigate to the target step you want to replace.
- Click Paste Step to apply the copied content into that position.
You can edit the pasted content and make sure to save once done.
Step 5. Make Sure No Error
Before you finish setting up your sequence, it’s important to verify that every step is complete and error-free.

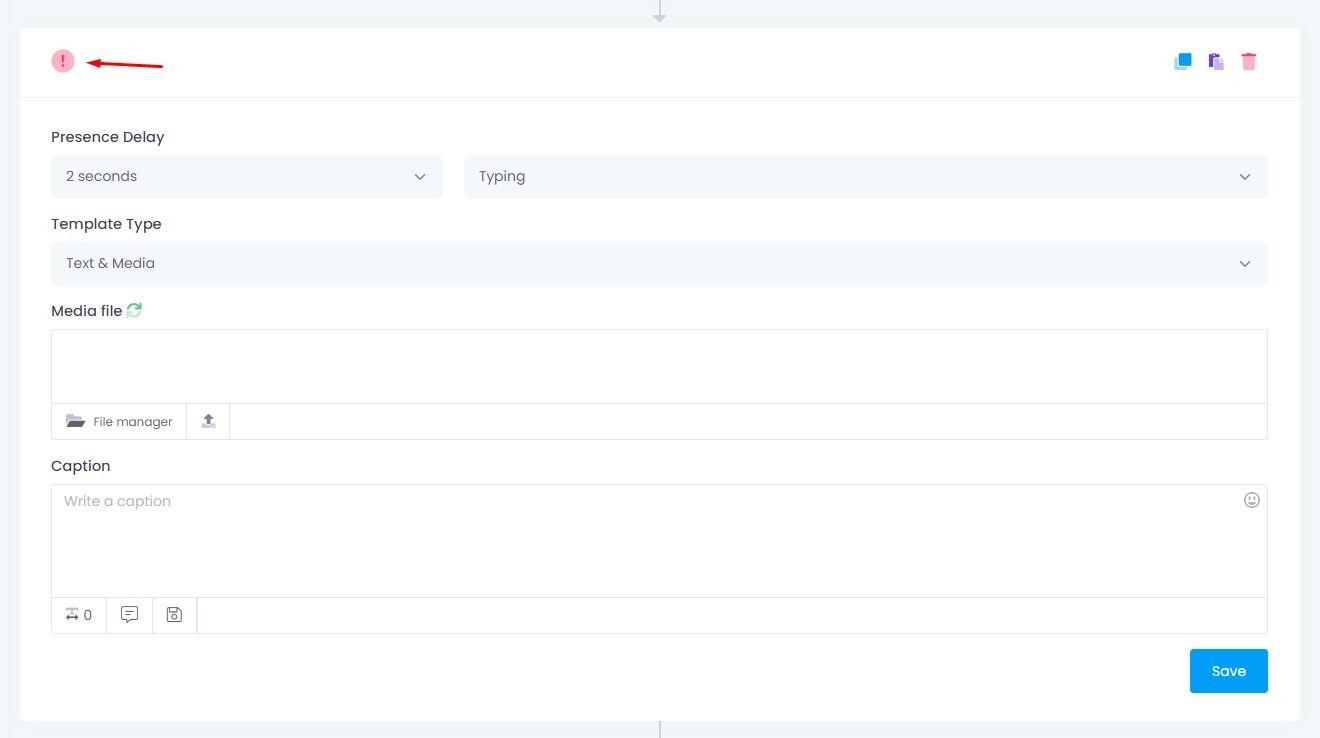
❗ Error Detection
If you save a step with missing or incomplete information (such as no caption or missing media), an error icon will appear:
- You will see a red exclamation mark on the step
- The main Sequence Message list will also show how many steps contain errors under the “Error” column
✅ Only Valid Steps Are Sent
The system will only send messages from steps that are completely filled out and saved correctly.
To fix:
- Open the step that has the red icon
- Complete all required fields (e.g., template type, caption, media)
- Click Save
Repeat this for each step until no error icons appear
Step 6. Choose Sequence Message
After creating your sequence, you can now assign it to any feature that supports Sequence Message, such as:
- Chatbot
- Auto Reply
- Bulk Messaging
- Quick Reply
- Away Message
- Reject Call
- Greeting Message
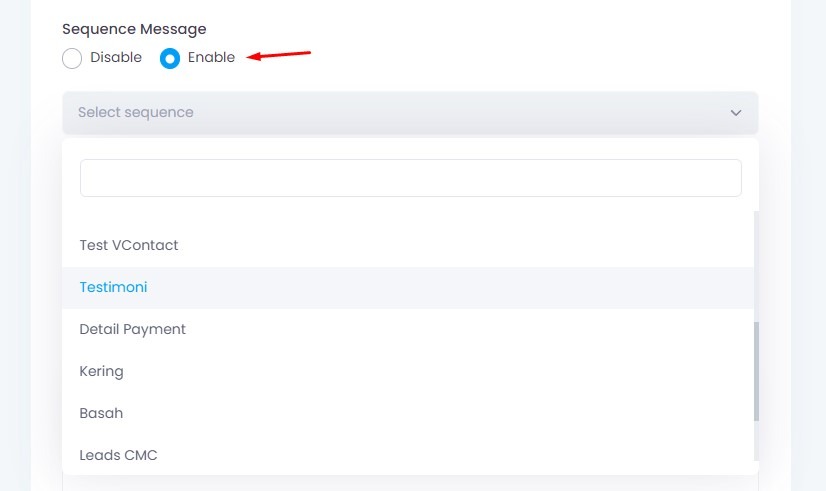
How to Assign Sequence
- Go to the feature you want to use (e.g. Chatbot)
- Scroll to the Sequence Message section
- Set it to Enable
- Choose the sequence you created from the dropdown list
Once selected, the sequence will run as part of your automation flow.
Duplicate Sequence Message
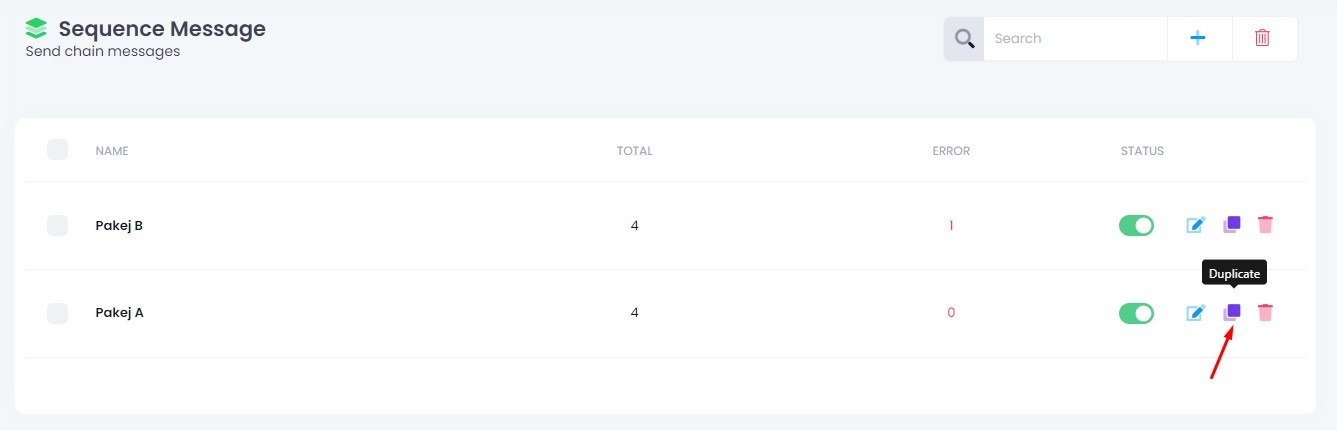
If you want to reuse an existing sequence for another campaign or chatbot, you can duplicate it:
- In the Sequence Message list, click the Duplicate icon (two overlapping papers)
- A new copy will appear in the list
- You can edit and rename it as needed
This is useful when managing similar message flows with only slight differences.
Import / Export Sequence with JSON
If you want to copy sequence flows between:
Different numbers under the same account → ✅ No need to import/export
Different accounts (emails) → ❗ Must use JSON Import
🔄 Different Email or Separate Account
If moving sequences to a different email/account:
📥 Importing via JSON
🧠 Important: Sequences that are not attached to the chatbot will not appear after import.
Example: Bulk Messaging + Sequence Message
With Sequence Message, you can send multiple follow-up messages through a single Bulk Messaging campaign, without creating multiple chatbots or separate messages.

Example Walkthrough
Main Bulk Message (Initial Message)
- Sent via Bulk Messaging
➡️ Introduces the topic with text, media, or both
Sequence 1
- Automatically sent after the bulk message
➡️ Additional info, teaser, or follow-up message
Sequence 2
- ➡️ Continues the flow with visual media or links
Sequence 3
- ➡️ Explains another feature or benefit
Sequence 4
- ➡️ Final step (CTA, extra resources, etc.)
Each message in the sequence is sent with the delay and media type you’ve configured, making your campaign smooth and well-structured.
✅ This powerful combo helps you build an engaging multi-step campaign in one go, improving results without complexity.