Click4Wasap offers a powerful Bulk Messaging feature, also known as WhatsApp Blast. It’s the only system that lets you send multiple files and messages to any number at the same time using bulk message.
⚠️ Please use responsibly. Avoid spamming and do not use personal numbers.
Step 1. WhatsApp > Features > Bulk Messaging

Go to:
WhatsApp > Features > Bulk MessagingYou will see your campaign list.
Step 2. Add New Campaign
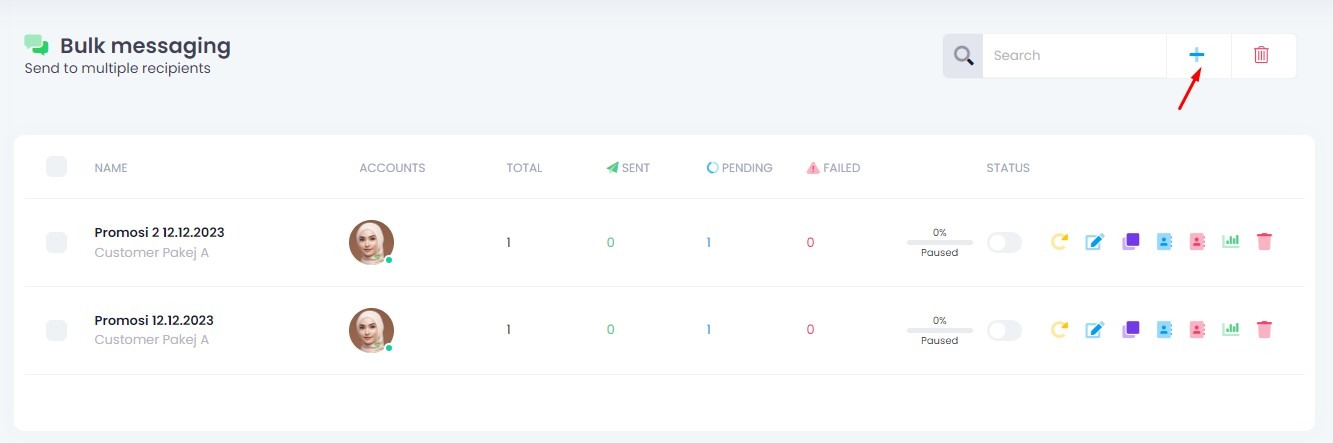
- Click the plus icon (+) to create a new campaign.
Step 3. Choose WhatsApp Account

Select one or more WhatsApp accounts. If you tick more than one account, Bulk Rotator will be activated.
What is Bulk Rotator?
Automatically rotates sender numbers during the campaign.
Your contact group will not receive duplicate messages from different numbers.
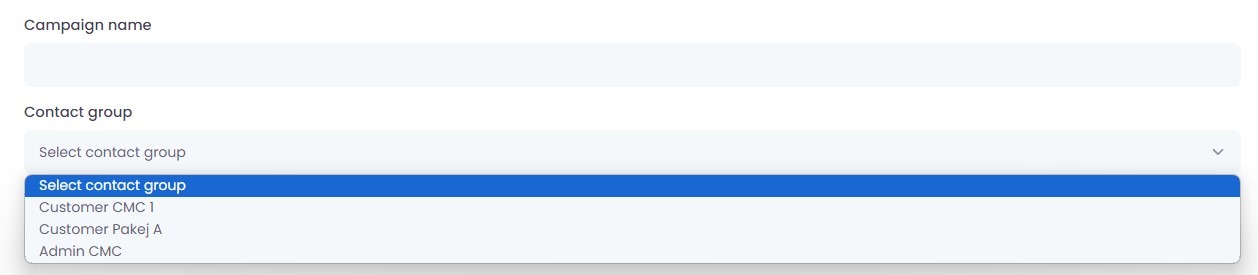
Step 4. Choose Contact Group
Step 5. Choose Template Type
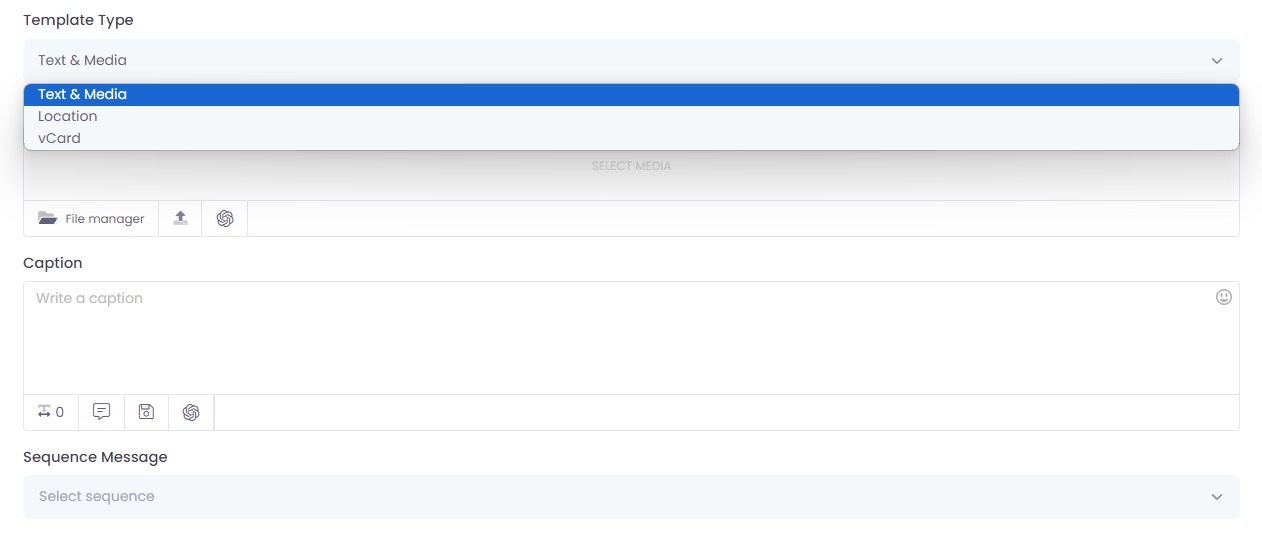
Choose your message type:
- Text & Media (text + image/video/other media)
- Location
- vCard
You may also select Sequence Message if you want to send multiple messages in a chain.
Step 6. Choose Time Post
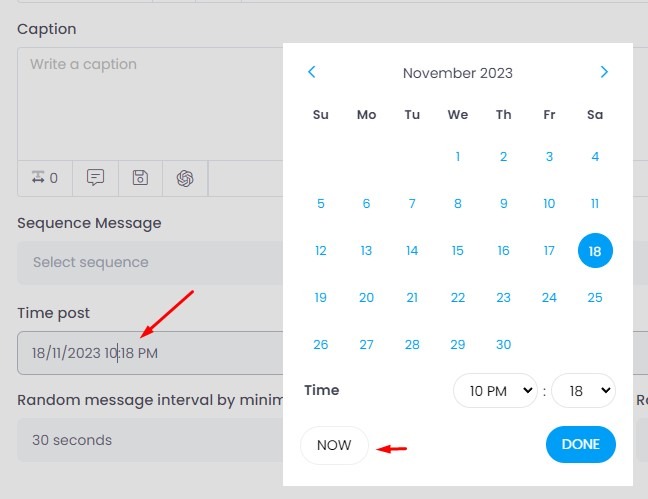
Choose the time and date when the campaign should start.
✅ You can choose “NOW” to start immediately, or schedule for a later time and date.
Step 7. Choose Interval Time
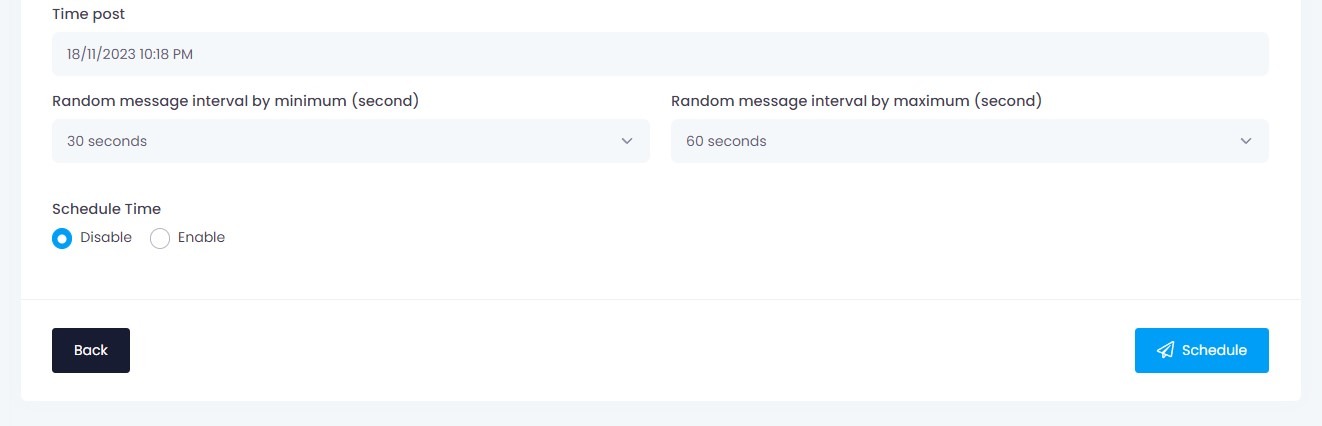
Set the delay between each message.
🔸 Example:
- Minimum: 30 seconds
- Maximum: 60 seconds
👉 Messages will be sent randomly between 30–60 seconds.
Example:
‣ Message 1: 30s
‣ Message 2: 45s
‣ Message 3: 59s
(Each recipient may receive the message at slightly different intervals)
We recommend using a range between 60 and 120 seconds to reduce the risk of getting banned.
Step 8. Click Schedule Button
After completing all steps, click the Schedule button to start your campaign.
Package Limitations
🔹 Active Campaign: 10
👉 This means you can only run up to 10 campaigns at the same time.
If you want to create more campaigns (e.g. campaign #11), you must pause one of the existing 10 active campaigns first.
The system won’t auto-pause the old ones.
✅ Example:
You already have 10 active campaigns.
Now you want to create a new campaign (campaign #11).
➡️ The system will not allow you to create until you manually pause at least one of the existing 10.
➡️ Only then will the “Create” button be enabled.
🎯 Important:
There’s no auto-pause, and you must manually manage your active campaign limit.
🔵 Campaign Min Interval (s)
If your package limit is 30, it means:
👉 The minimum delay between each message must be 30 seconds or more.
You cannot set it lower than 30.
🟠 Campaign Interval Gap
f your package limit is 30, it means:
👉 The gap between the minimum and maximum delay must be at least 30 seconds.
You can set a wider range, but not smaller.
✅ Example Settings
| Setting | Value | Description |
|---|---|---|
| Campaign Min Interval | 30 seconds | The shortest delay allowed between each message |
| Campaign Interval Gap | 30 seconds | The minimum required difference between minimum and maximum interval |
| Allowed Random Interval | 30 to 60 sec | System will randomly send messages between 30 and 60 seconds |
| Other Allowed Example | 30 to 90 sec | ✅ Also allowed because the gap is 60 (which is more than 30) |
| Not Allowed Example | 30 to 50 sec | ❌ Not allowed because the gap is only 20 (less than 30) |
💬 Simple Explanation
Campaign Min Interval (s) = The shortest delay you can set (must be ≥ your package value)
Campaign Interval Gap = The difference between your maximum and minimum interval
✅ Must be at least the value allowed in your plan