→ Integrations > WooCommerce > List Template > Add New Template
Fields to Fill:
Template Name ➤ Enter a name for your template (e.g., Candyta Order)
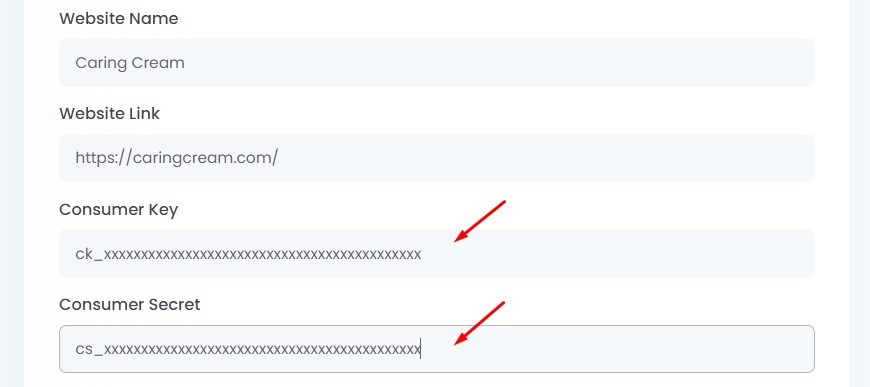
Website Name ➤ Select the connected WooCommerce site (e.g., candyta.com)
Status ➤ Set to Enable to activate the template
Topic ➤ Choose the trigger type:
order.created – When a new order is placed
order.updated – When order status changes
Action – Custom condition outside created/updated
Sent to ➤ Select whether to notify:
Customer
Seller
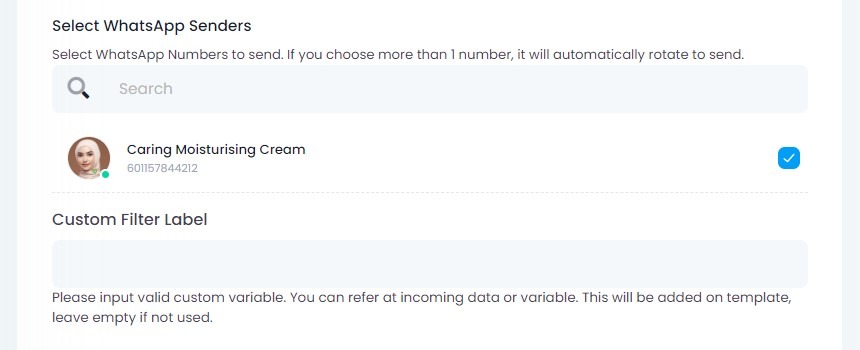
Seller WhatsApp Number ➤ If Seller is selected, enter the full WhatsApp number(s) including domain ➤ Example: [email protected]
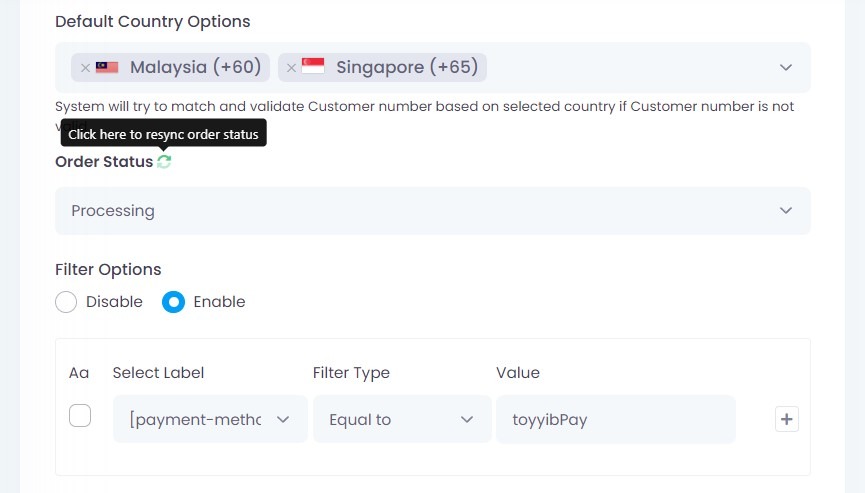
Order Status ➤ Choose the WooCommerce order status that will trigger the message ➤ Example: Processing
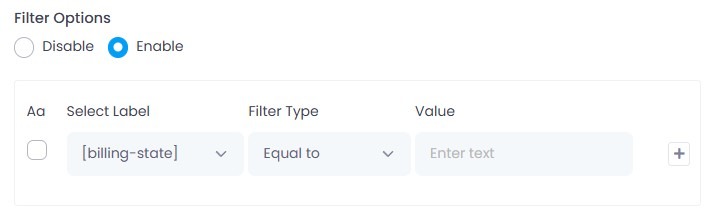
Filter Options (Optional) ➤ Enable if you want to set specific rules
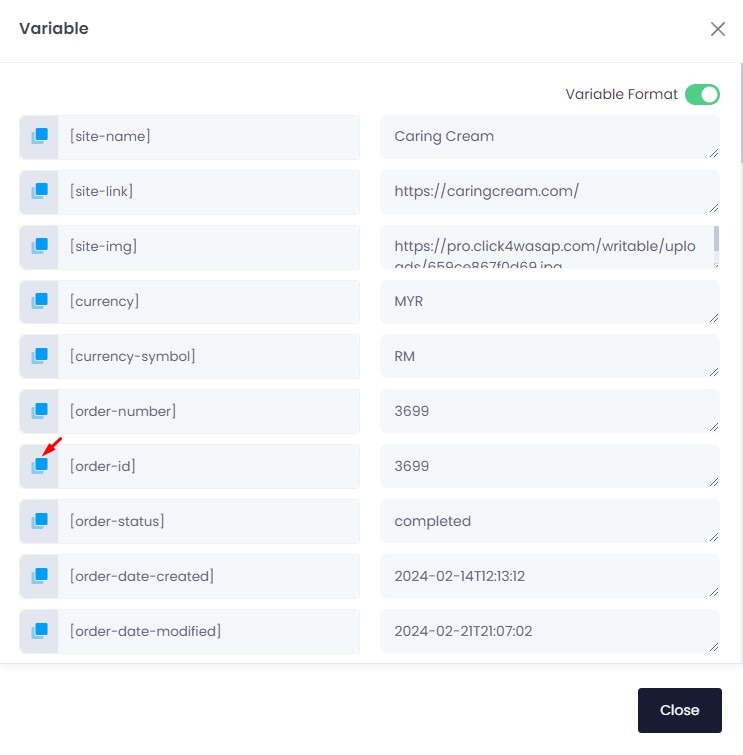
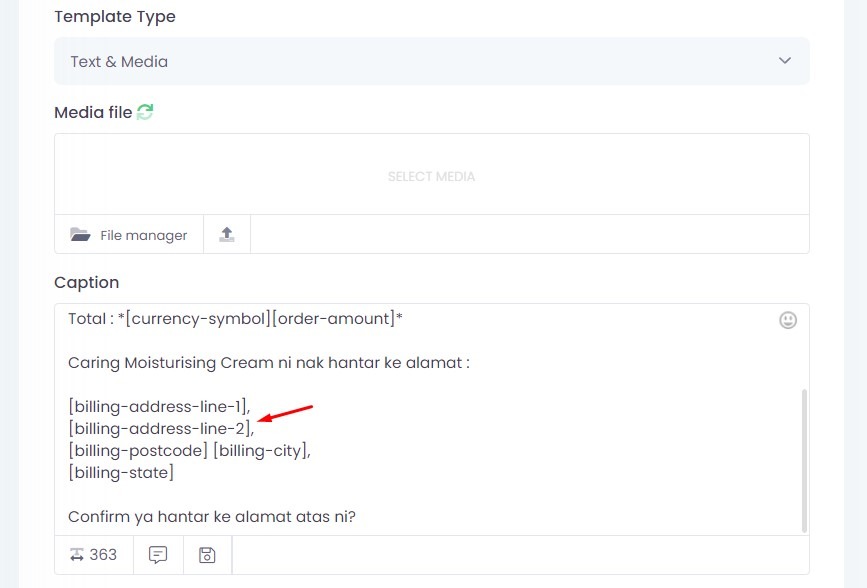
You can insert variable at Text & Media Caption.
⚙️ Template Send Settings
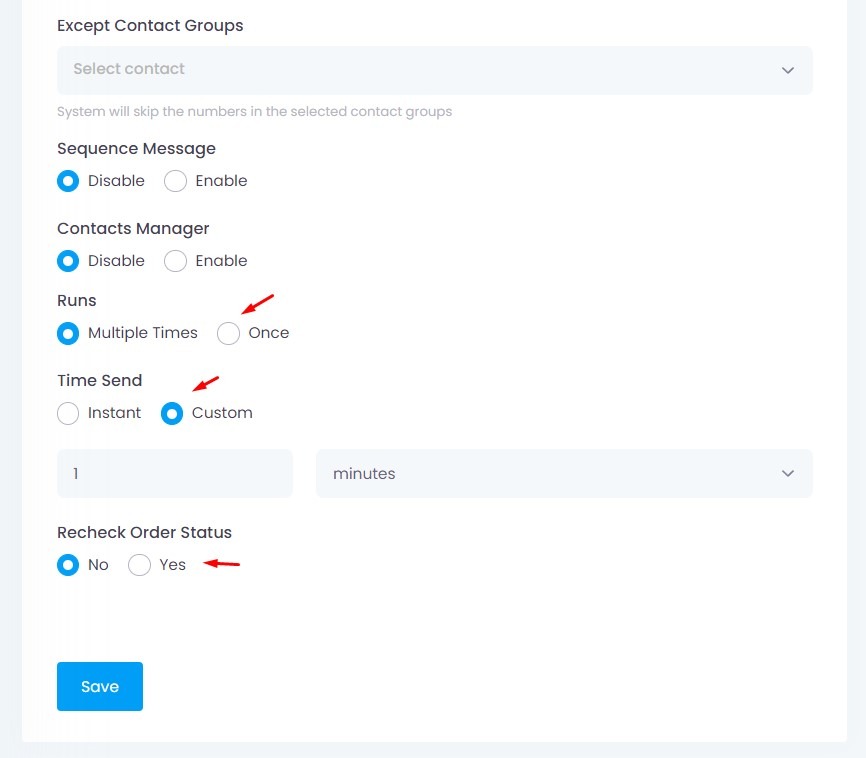
🕘 Runs
Multiple Times – The template will be sent every time the selected status is triggered.
Once – The template will be sent only one time.
⏱️ Time Send
Instant – The message will be sent immediately when the condition is met.
Custom (Follow Up) – The message will be sent after a custom delay (e.g., 1 hour later).
🔄 Recheck Order Status
No – The message will be sent after the delay without checking if the status has changed.
Yes – Before sending, the system will recheck the order status. If it has changed, the message will not be sent.
Filter Option
If you want to send a message only when specific conditions are met, enable the Filter Options.
Case-Sensitive Filter (Aa Checkbox)
You will see an Aa column with a checkbox next to each filter condition.
✅ What It Does:
Tick the checkbox to enable case-sensitive matching → This means Selangor ≠ selangor
Leave it unticked for case-insensitive matching → This means Selangor = selangor = SELANGOR
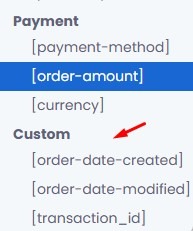
Custom Filter Label
The Custom Filter Label allows you to define a specific variable from your WooCommerce Incoming Data that will appear as a filter option when creating templates.
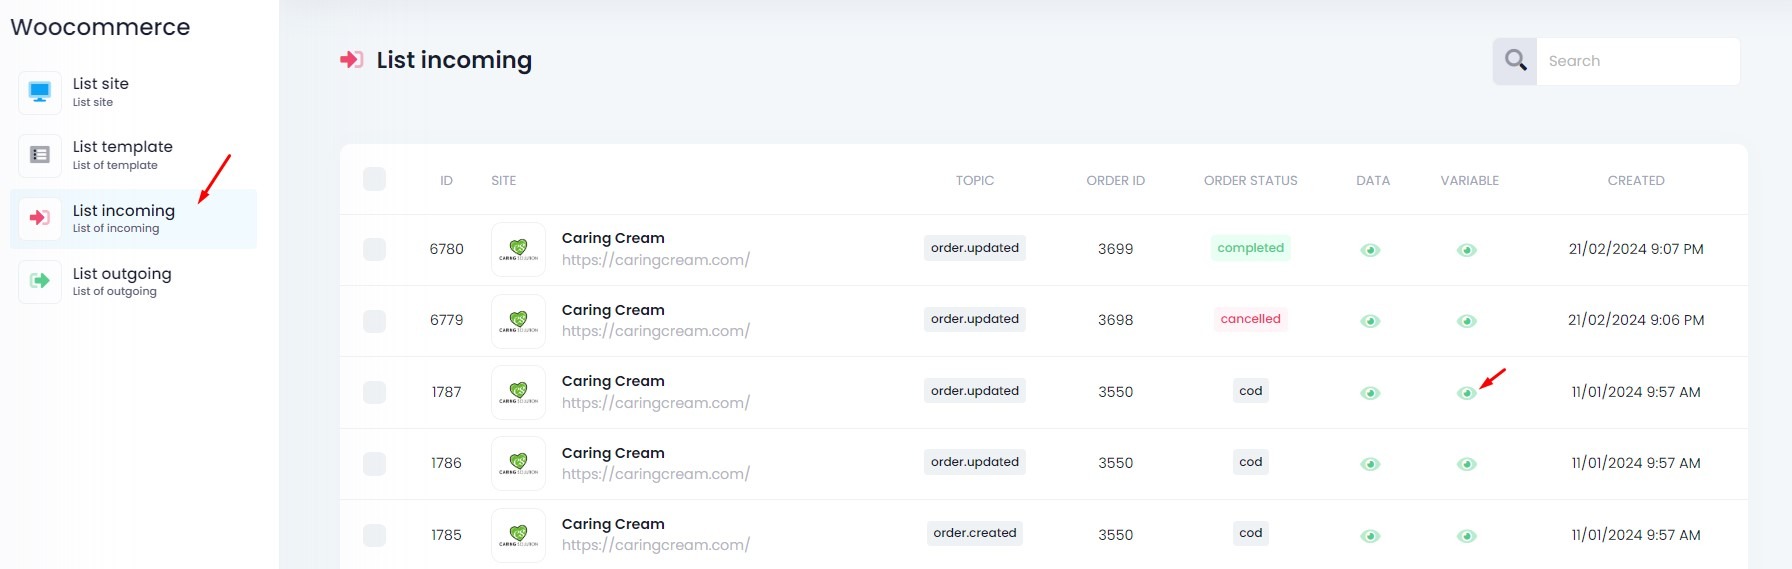
Check Variables in Incoming List → Go to List Incoming → Click View on an order → Copy any valid variable (refer step 9)
Paste the full variable name (including brackets) into the Custom Filter Label field in the List Site setup.
This variable will:
Be used to label and group your incoming data
Show up in filters or templates if referenced properly
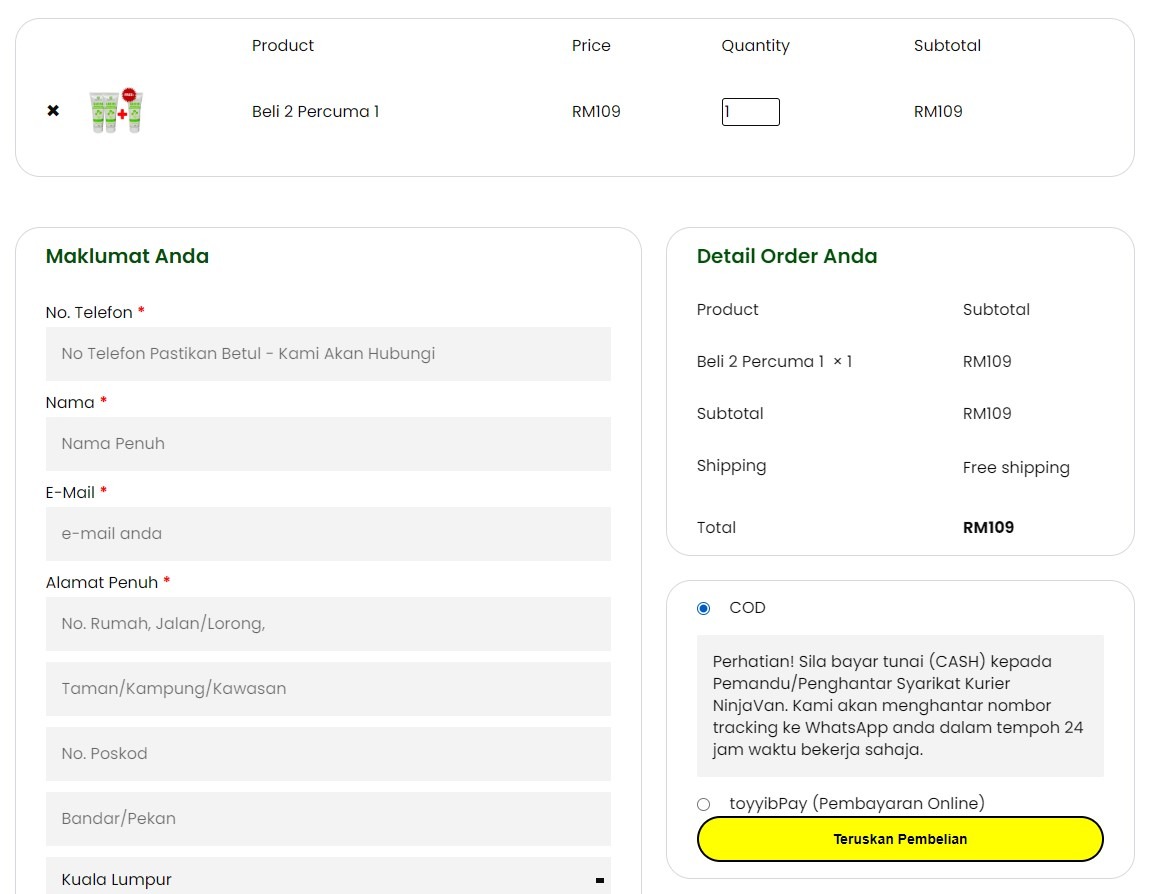
Step 11. Create Dummy Order again at WooCommerce
Make a dummy order again to check your setup
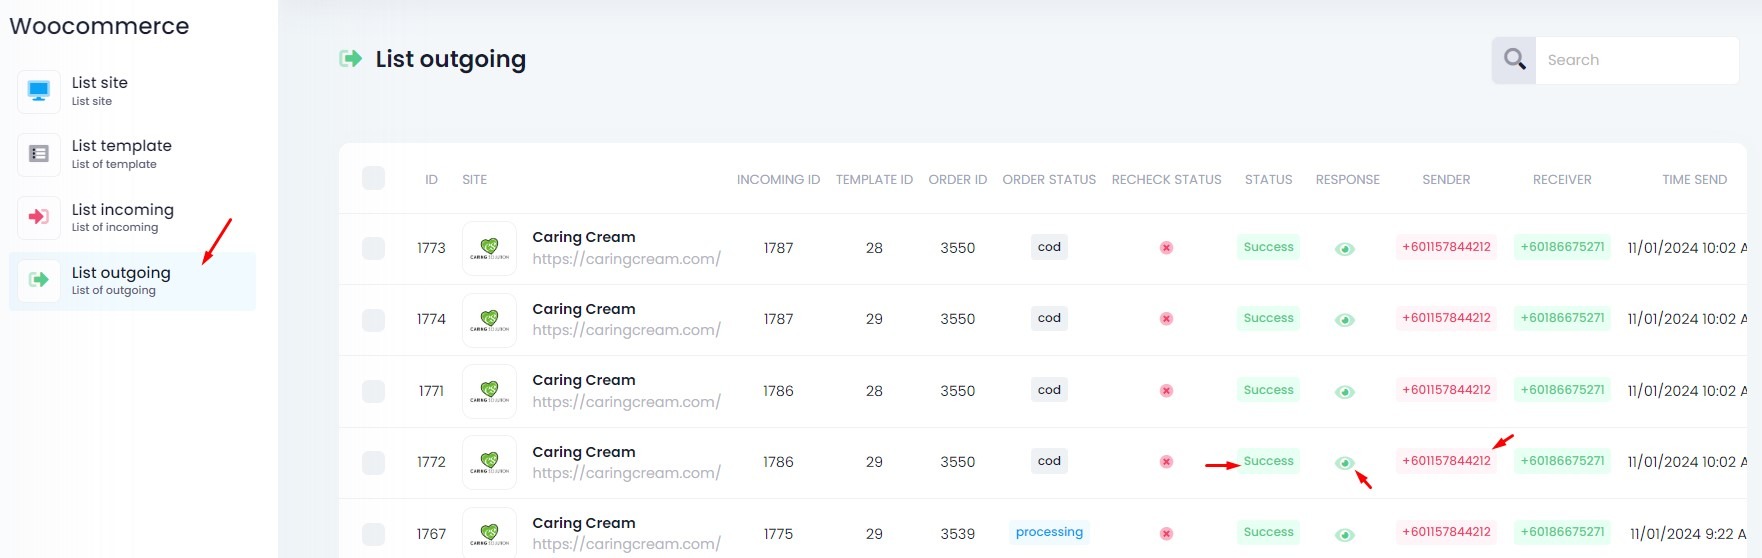
Step 12. List Outgoing
📥 Incoming & Outgoing Data
After placing a dummy order, if your setup is correct:
You will see data in both List Incoming and List Outgoing
(Only if you’ve set up a valid List Template)
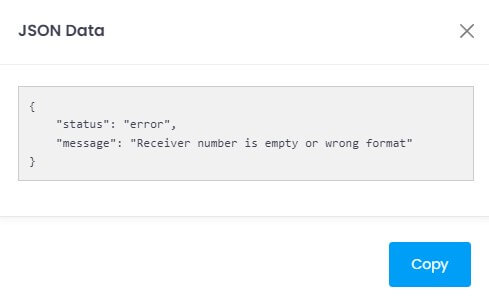
Example JSON Response
What This Means:
The system could not send the message because:
The phone number field is empty, or
The number is in an invalid format (e.g., missing country code or incorrect variable)
✅ How to Fix:
Make sure the correct phone variable (e.g. [phone]) is used in your template
Ensure the number includes a country code (e.g., 60123456789)
Double-check the form captures phone input properly
Use Default Country Options to help validate numbers