Discount 25% Promo Code : YEAREND2024

Tutorial

API Rest Data

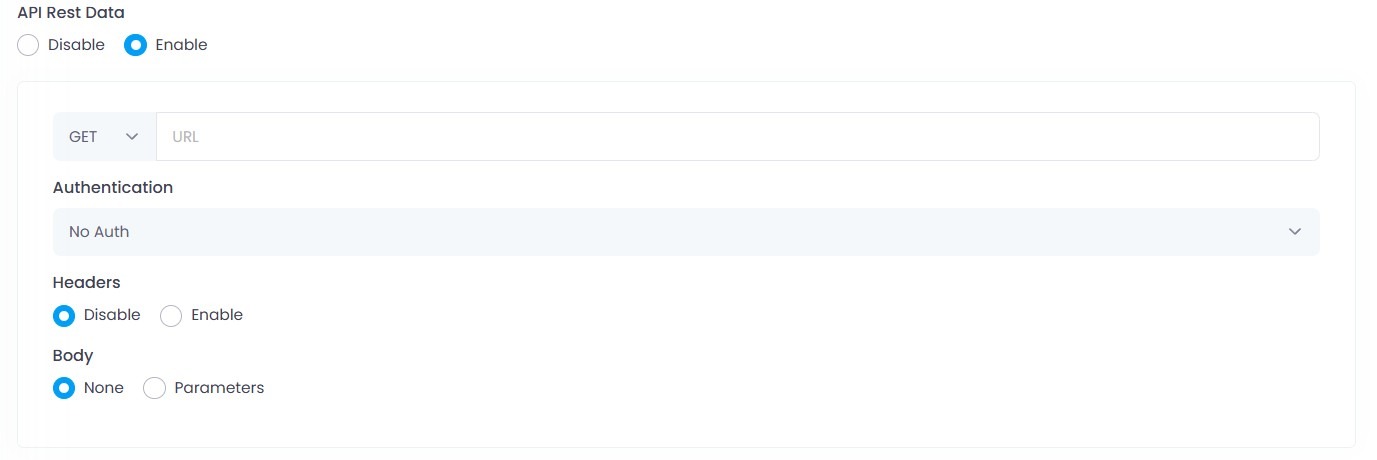
The API Rest Data feature lets your chatbot send or receive data from external systems (such as CRMs, booking platforms, or your own backend) before sending a reply. 

Enable API Rest Data

    • Set API Rest Data to Enable

    • The bot will send a request to the specified API when the keyword is triggered 
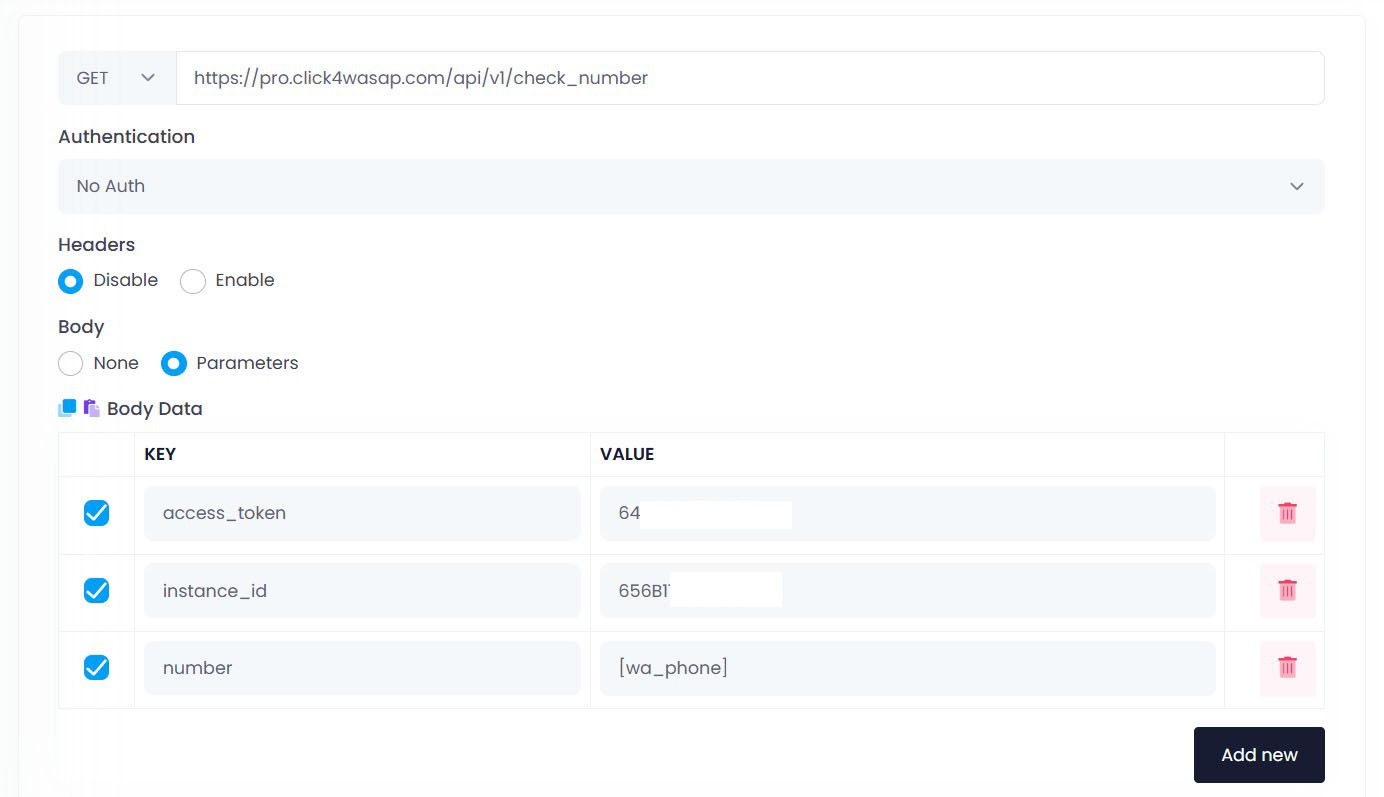
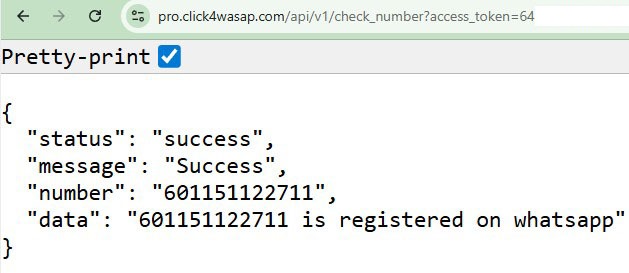
🔵 GET Method

🔧 Use When:

You want to fetch data like user info, order status, or external content.

Required:

  • Method: GET
  • URL: API endpoint

Example URL:

  • Body Parameters:

    • query = {message}

    • phone = {sender}

✅ Will be sent as:

				
					https://api.example.com/search?query=Hello&phone=60123456789


🔴 POST Method

🔧 Use When:

You want to send data to another system (e.g. log a message, submit a form, store lead).

Required:

  • Method: POST

  • URL: API endpoint

POST Body Options

When using the POST method, you must choose how your data will be sent in the request body. Click4Wasap supports three formats:

FormatHeader
Form Datamultipart/form-data
Form Data Encodedapplication/x-www-form-urlencoded
JSONapplication/json

Form Data

  • Format: multipart/form-data
  • Most common for web forms and file uploads
  • Sends key-value pairs like a browser form
  • Each field is sent as a separate form entry

Example Key-Value Setup:

KeyValue
phone{sender}
name{name}
message{message}

🔧 Use when:

  • API is expecting standard form submissions
  • Files need to be uploaded (in some APIs)

Form Data Encoded

  • Format: application/x-www-form-urlencoded

  • Used by many legacy systems and websites

  • Sends data like a URL query string, but inside the body

Sent as:

				
					phone=60123456789&name=Ali&message=Hello


💡 Use when:

  • The API expects form-style body but without file support
  • You see docs mention x-www-form-urlencoded

JSON

  • Format: application/json

  • Most modern and widely accepted format for APIs

  • Sends structured data in JSON format

Example Body JSON:

				
					{
  "phone": "{sender}",
  "message": "{message}",
  "name": "{name}"
}
				
			
  • 📌 Make sure to set the header: 

				
					Content-Type: application/json


🔧 Use when:

  • The API documentation asks for JSON
  • You are using services like OpenAI, Stripe, Firebase, etc.

🔐 Authentication Types

TypeDescription
No AuthFor public or test APIs
Basic AuthUses username and password (base64)
Bearer TokenUses a secure access token
  • Example for Bearer Token:

				
					Authorization: Bearer your_token


Real Example: Check WhatsApp Number via API

🧩 Goal:

When someone types check_number in WhatsApp, the chatbot will:

  • Call the API https://pro.click4wasap.com/api/v1/check_number
  • Send phone number and credentials as parameters
  • Reply with WhatsApp registration status

🔧 Step-by-Step Configuration

1. Trigger Keyword

Set your chatbot keyword as:

				
					check_number


2. API Rest Data Settings

  • Enable API Rest Data
  • Method: GET
  • URL:
				
					https://pro.click4wasap.com/api/v1/check_number


  • Authentication: No Auth
  • Headers: Disable
  • Body: Select Parameters

✅ Body Data:

KeyValue
access_token64cxxxxxxxxxx
instance_id656xxxxxxxxxx
number[wa_phone]

3. Set the Reply

In the Caption box, enter:

				
					result :
[data]


✅ API Response (Sample)

				
					{
  "status": "success",
  "message": "Success",
  "number": "601151122711",
  "data": "601151122711 is registered on whatsapp"
}


📌 Summary Table

FeatureGETPOST
Send data✅ via URL query✅ via body (Form, Encoded, JSON)
Receive data✅ Yes✅ Yes (if API returns response)
Support headers✅ Yes✅ Yes
Auth supported✅ Yes✅ Yes
Use parameters✅ Converts to query string✅ Sent in body